

I had the chance to root around 100 pomegranate cuttings using two different techniques this year.
I lost a few cuttings, but for the most part had good success using two methods that are also commonly used to propagate figs:
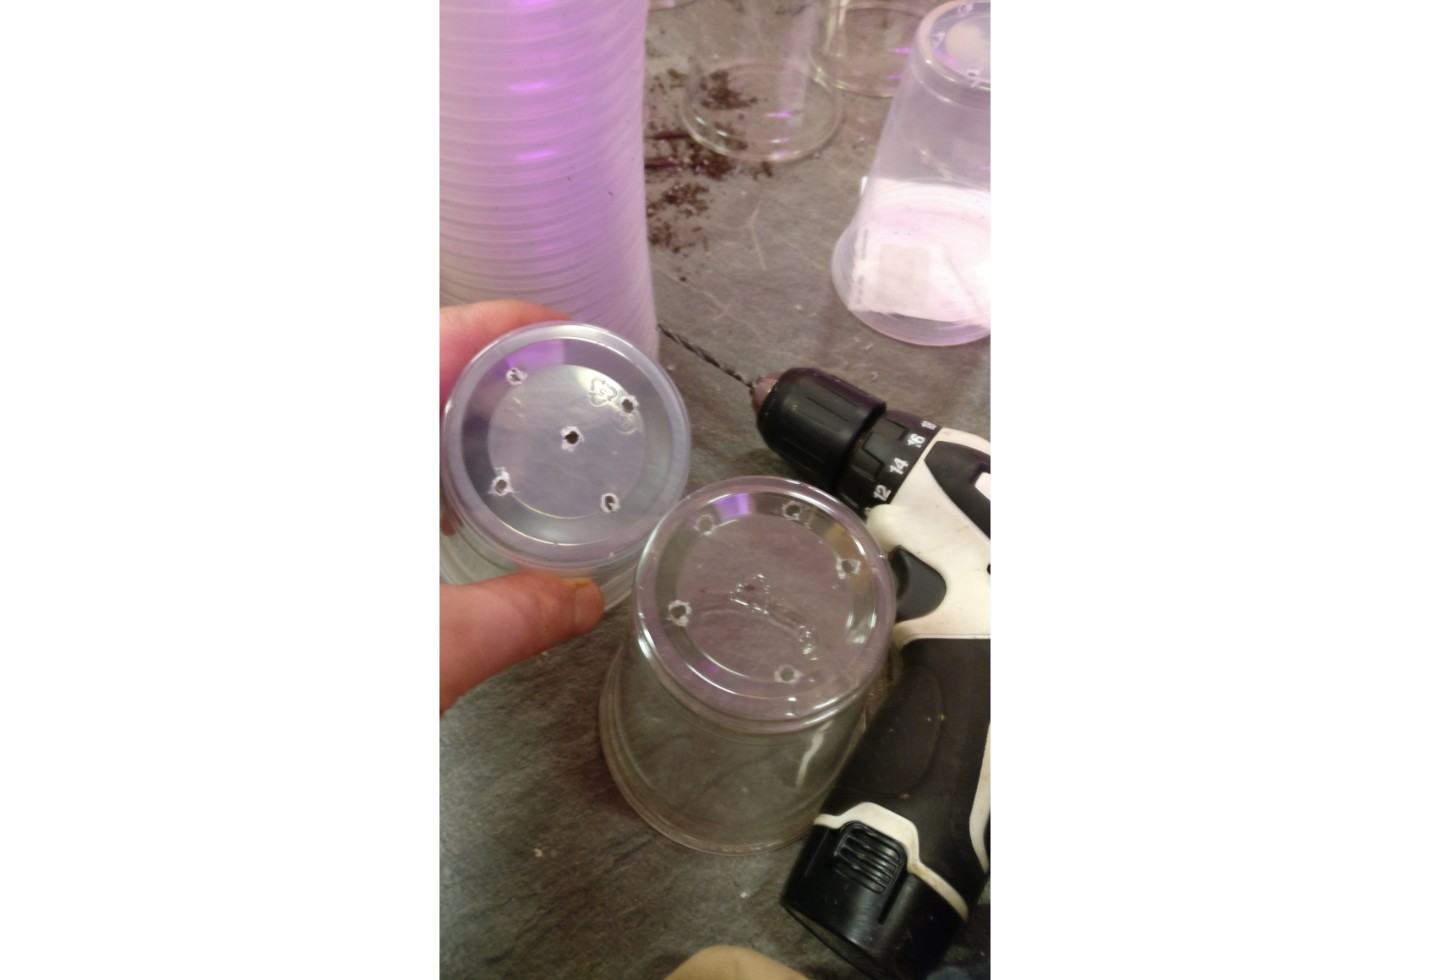
ROOTING CUTTINGS DIRECTLY IN SOIL (or drinking cups with drainage holes drilled in them, in this case)
and
PRE-ROOTING CUTTINGS IN A PROPAGATION MEDIUM
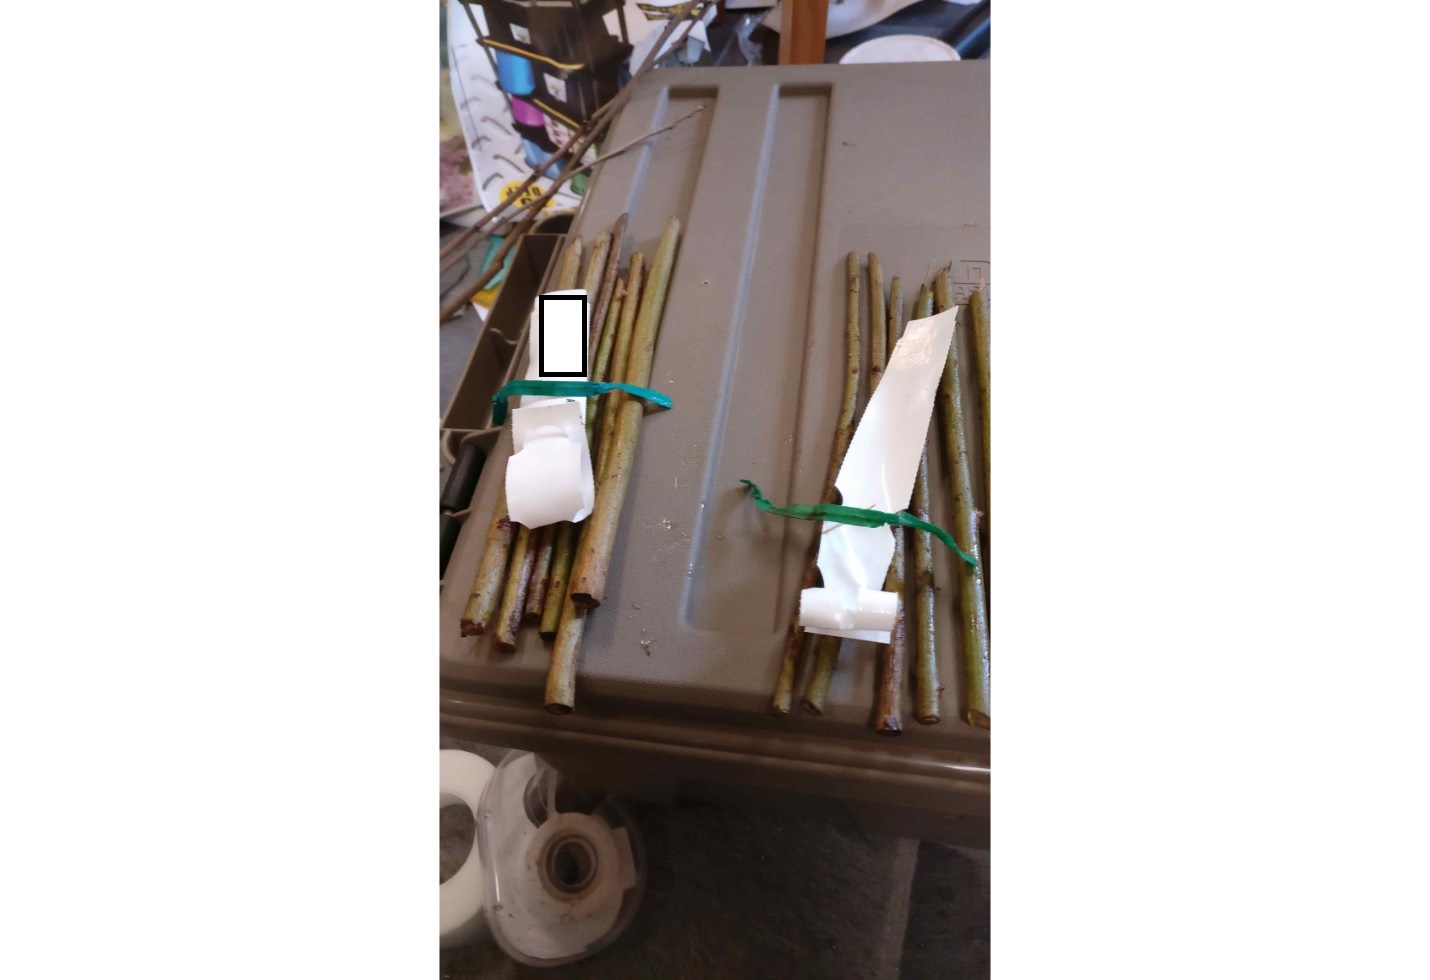
In either scenario, starting out, you'll need your germplasm material - the cuttings shown in the photos were taken from dormant plants, with a diameter of each cutting approaching that of a pencil and the length also similar to a pencil. (You know what, you should probably go ahead and grab a #2 pencil because it's a good reference and you'll need it for a later step, anyway.)
I would stay away from trying to root much thinner or much much thicker cuttings then pencil or Sharpie size, as it seems the success rate is less. You'll want to make sure each cutting has at least 3 nodes (the places where the stem is segmented, and where leaves and buds form) to have the best chance of success, but I'm aware some have had success rooting smaller cuttings with less nodes than this. I might try using less nodes next time around.
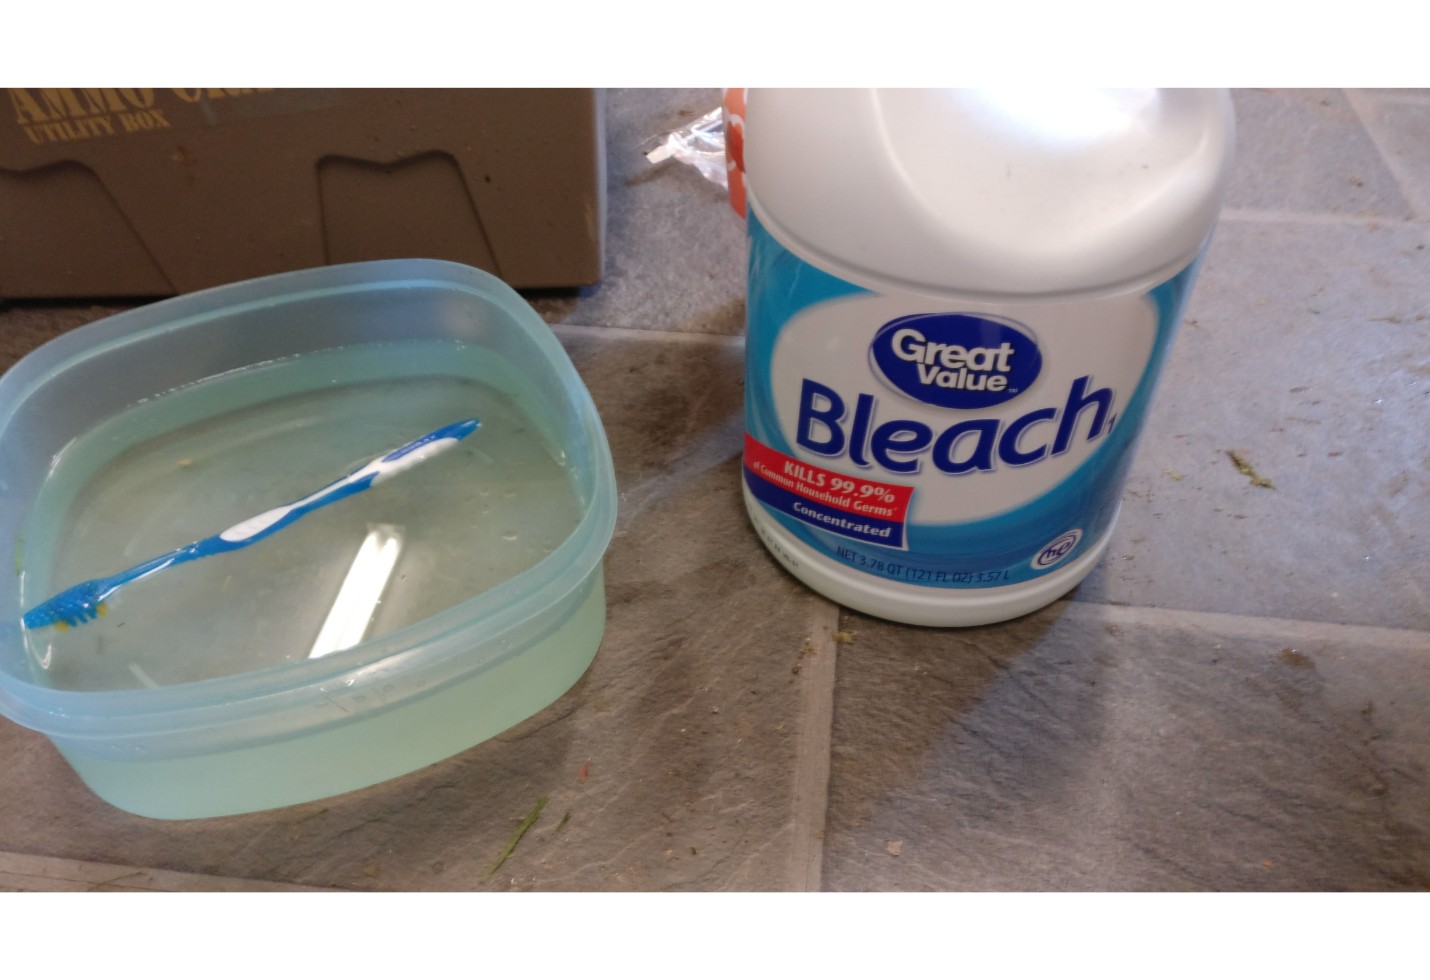
The first thing I like to do when rooting a batch of cuttings, is to clean up the work area - it's generally good practice to maintain as clean a work environment as possible, although I'm pretty lax about cleaning and liberal on the disinfectant. Being clean and disinfecting the area can cut down on failures from contamination and from other preventable things like not having the appropriate materials on hand at the time they are needed (this has led to a few graft failures on my part).
I like to use either isopropyl or bleach to clean, with the bleach being diluted in a good bit of water. I also take this time to use a weak bleach solution and a toothbrush to scrub the pomegranate cuttings' exterior. This may be an unnecessary step, but I feel it could also prevent mold contamination, so I do it anyway for the peace of mind. Just don't scrub TOO hard!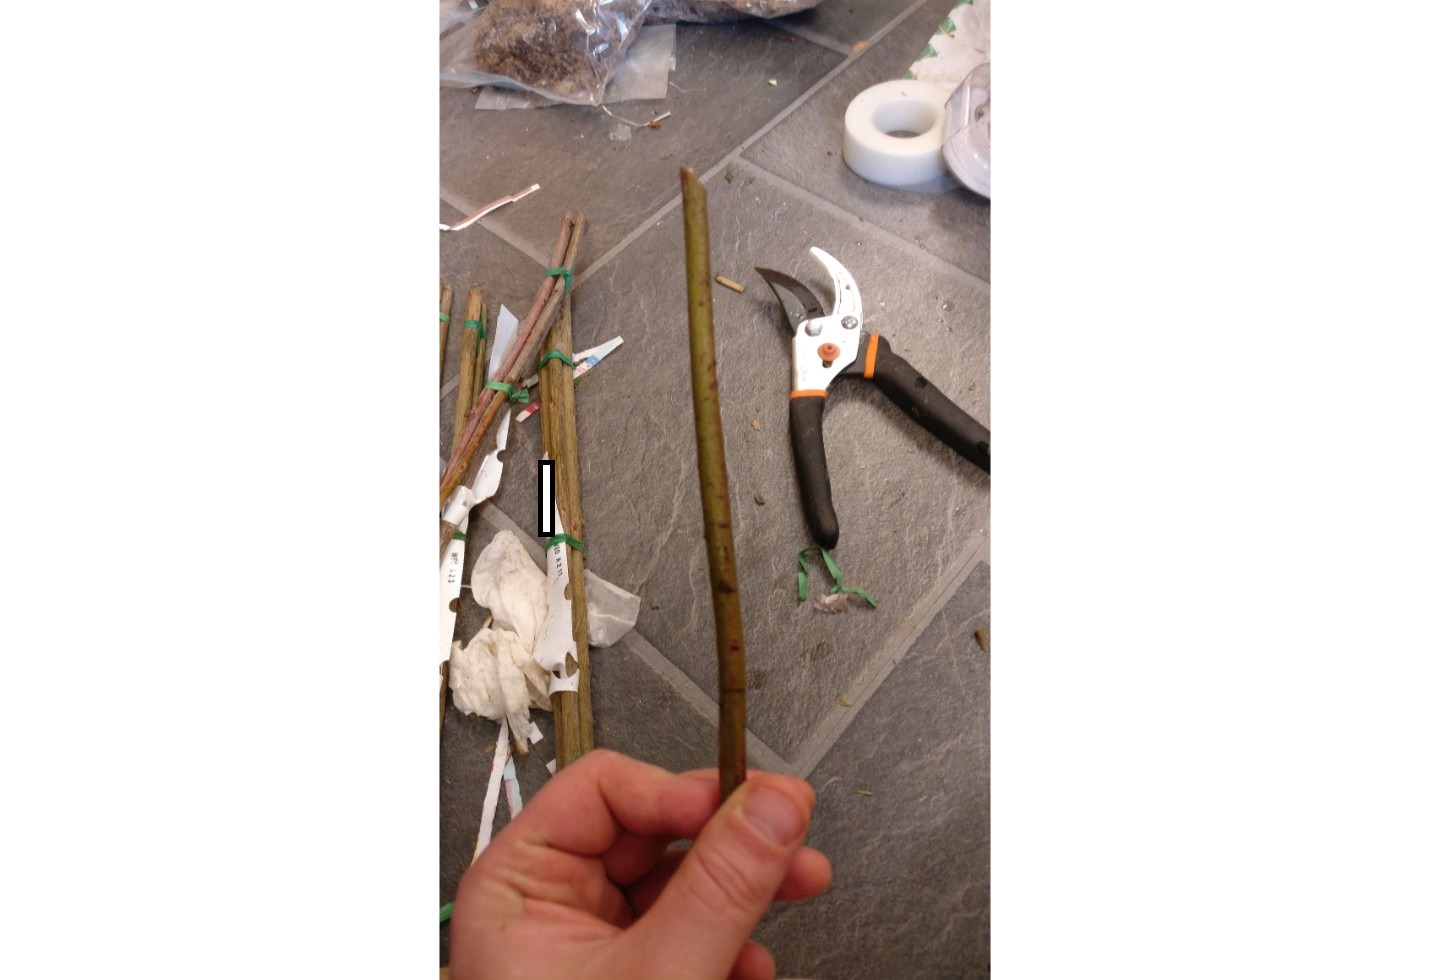
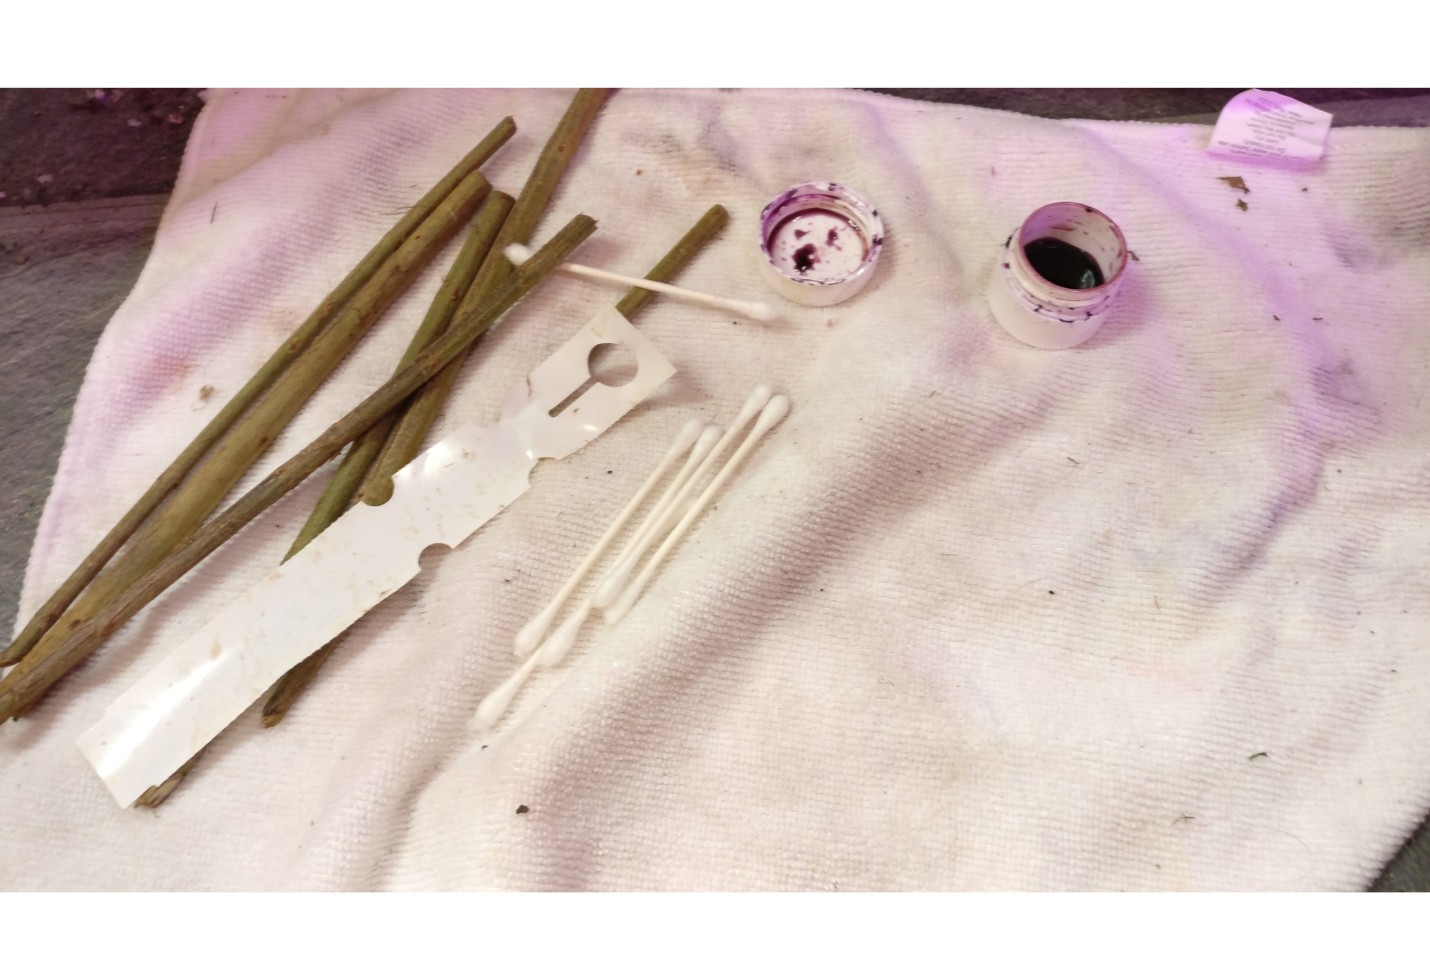
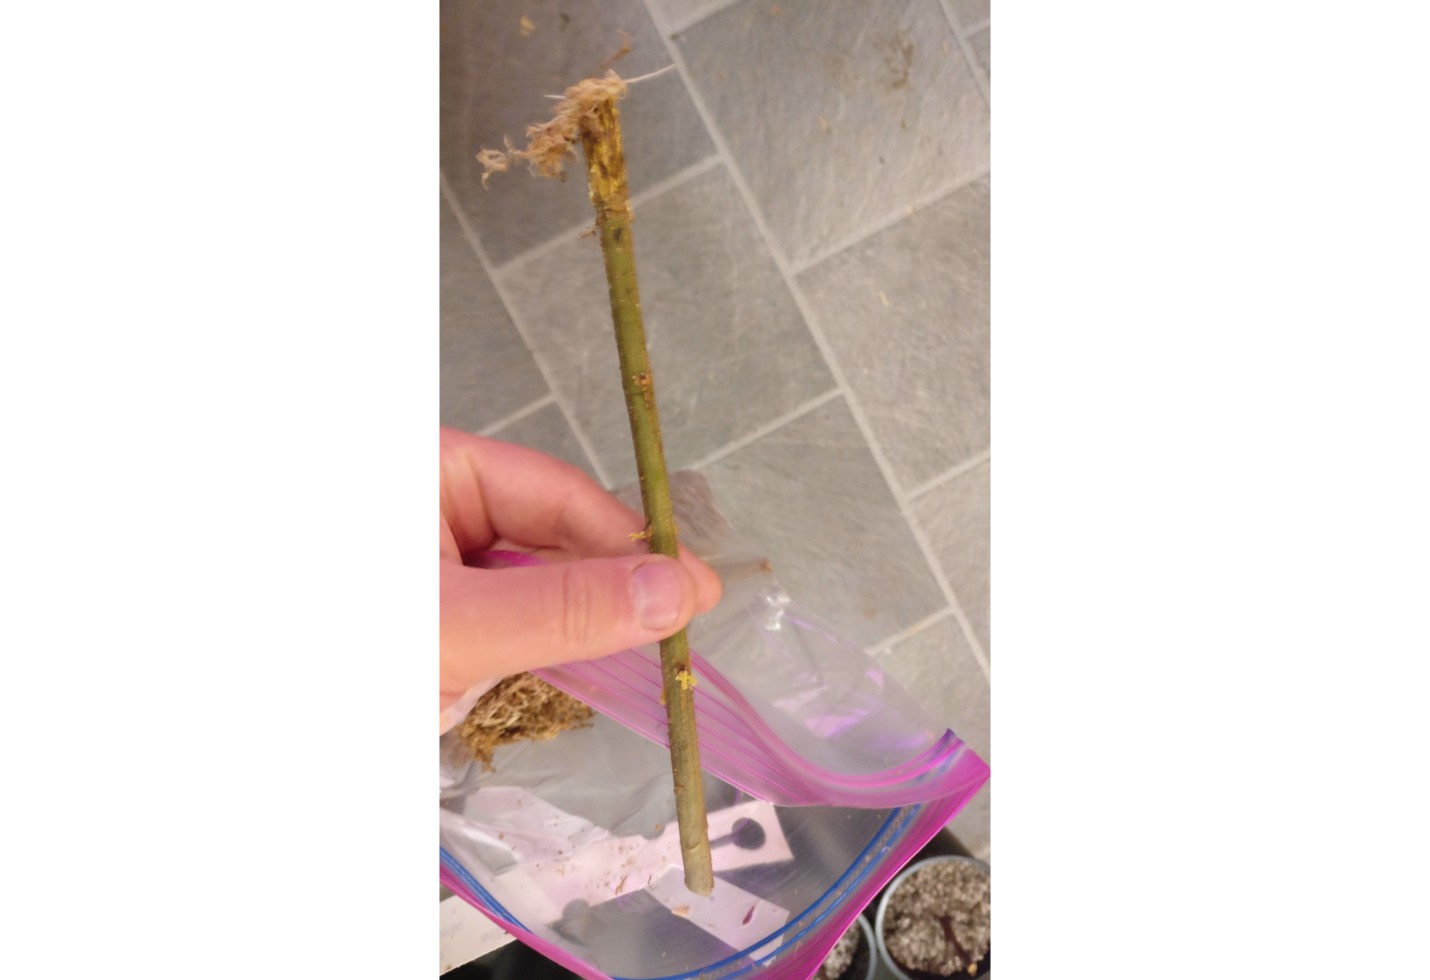
Next, I lay out the cutting wood I will be using, with the top of the cuttings furthest from me. I then take each cutting (being extra careful to keep track of varieties and not to accidentally mix them up - always make sure to have them identified and labeled) and snip the top of the cutting at a 45 degree slant, to be able to differentiate the top from the bottom of the cutting.
Again, this may seem like an unnecessary step, but it only takes a few extra minutes overall and can save a whole lot of frustration and mistakes like trying to apply rooting hormone to the wrong side of a cutting!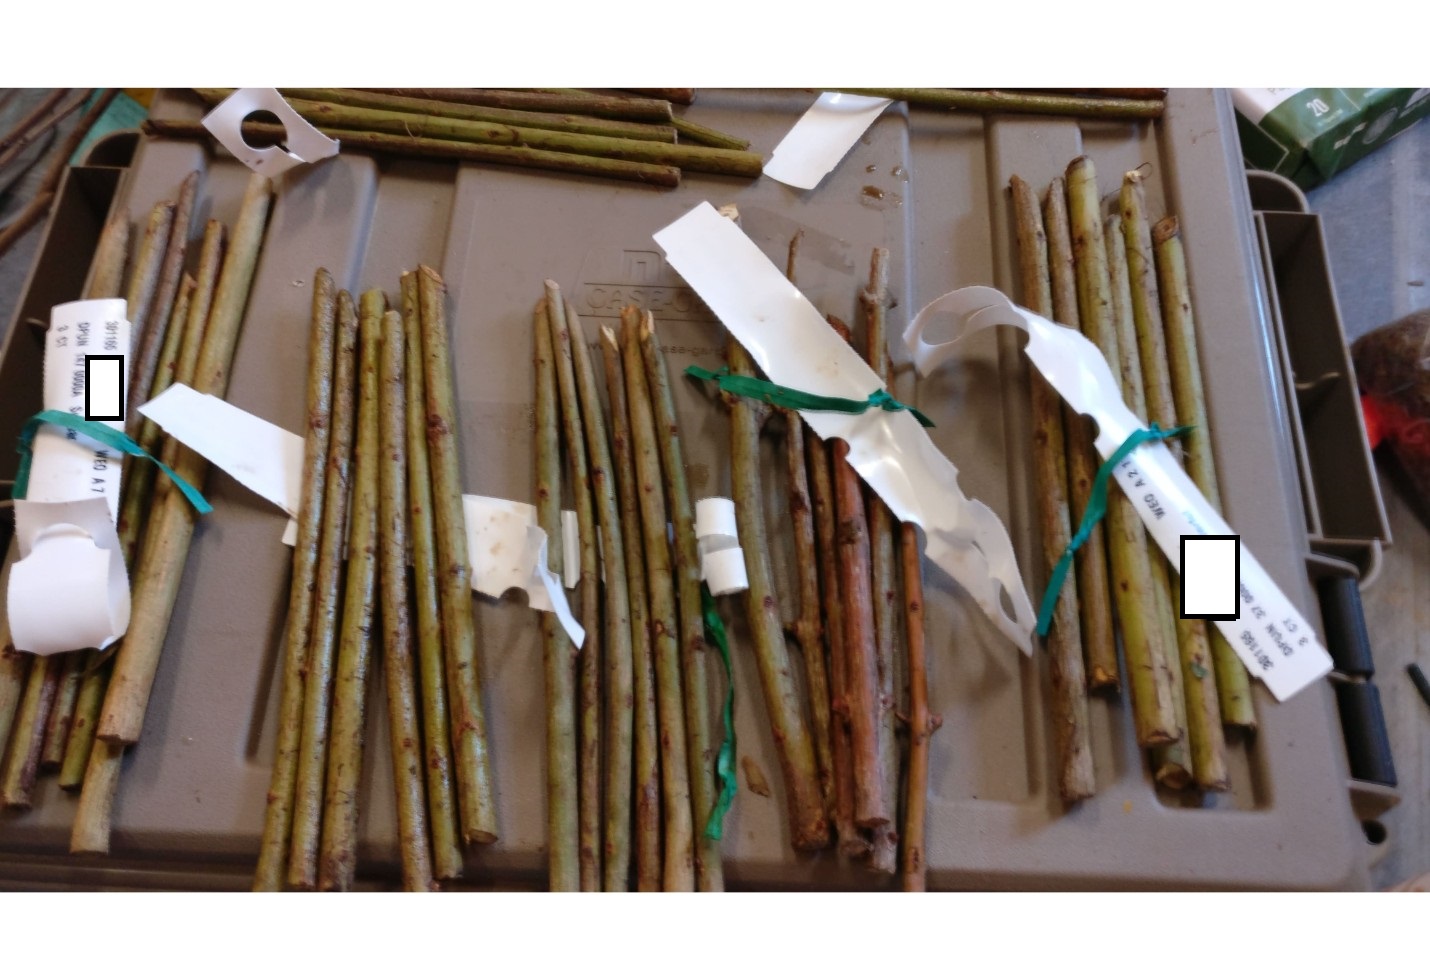
OPTIONAL: Totally optional but may marginally increase the success rate: Parafilm wrap. I get mine on Ebay as it was a lot cheaper than buying it from a nursery supply store locally, but check around and you may be surprised. It's really good stuff to wrap grafts, cuttings, etc to prevent them from desiccating.
I found no difference in my pomegranate rooting success rate using parafilm, but your mileage may vary. As a general rule, the more exposed cuts, or the greener or softer the cutting, the more you'll probably want to wrap it to prevent it drying out.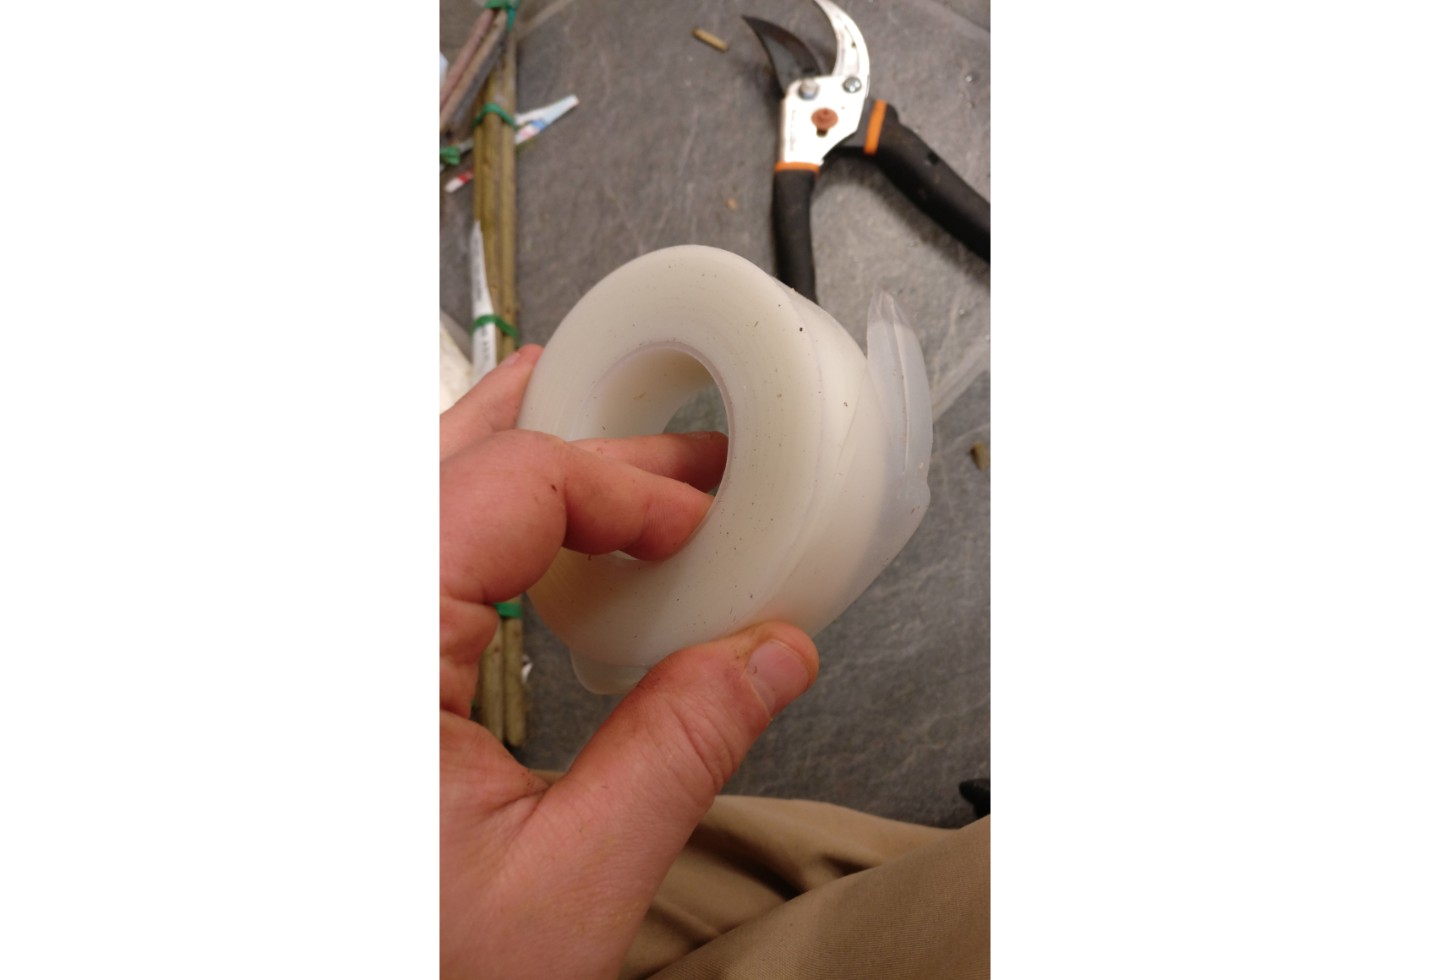
SOMEWHAT LESS OPTIONAL: Rooting hormone. Do take the time to apply your preference of rooting hormone to the bottom 1/3 of the cutting - I did notice a positive influence on my success rate when using rooting hormone. I prefer to use the rooting gels as I've always had bad luck with powders either getting too wet or drying out the cutting, but do what works best for you.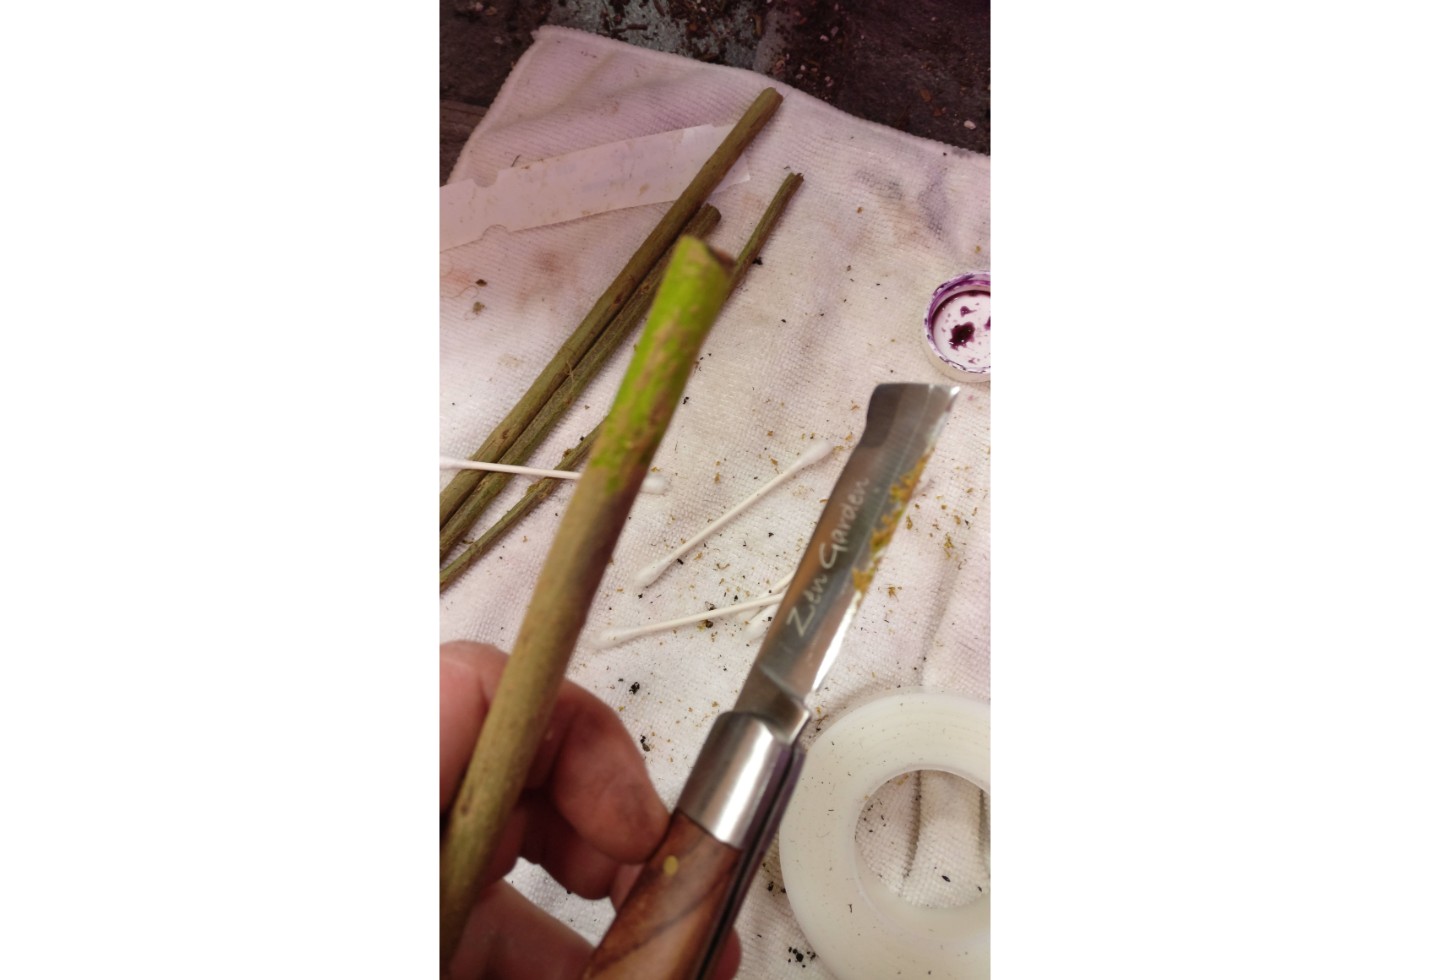
The other suggestion I can make that might improve the chance of the cutting taking, is to scrape some of the bark on the bottom 1/3 of the cutting to expose the green/cambium layer. Do this before you apply the rooting hormone, or you'll be scraping it off with the bark, too. Scraping the bark down to the cambium also seems to have the welcome side effect of allowing more surface area for producing roots - it seems this can make the cutting's root system more robust along with providing more cambium layer exposure for more adventitious root development in the first place. I'll need to do a few tests in the clear cups next time I do pomegranate cuttings, and I'll measure root mass and see if there is a noticeable difference, if I have some time!
Now, we are at a crossroad...which rooting method to use? Ultimately, both of the methods below are absolutely viable methods with which to propagate plants. I'd say, try them both out and see which fits your set up better. The first example below, is probably the easiest with regards to the materials used and the time and effort it takes to complete the steps.
EXAMPLE/PATH 1 - ROOTING IN CONTAINERS (CUPS WITH DRAINAGE HOLES DRILLED IN THEM + SOIL)
If you've followed the post up to this point, you should have your cuttings with the tips nipped to an angle, with the bottom of the cuttings covered in a light layer of rooting hormone and the cambium exposed, these last two steps being optional but recommended.
(Notes on soil mix:
You'll want to make sure the 'soil' mix you're using is as good as it can be with regards to providing aeration of the roots and consistent (READ: NOT WET OR DRY, ONLY MOIST) moisture. This is probably the biggest factor in determining your success with rooting cuttings.
Too wet, and the cuttings will rot. Too dry, and the roots will desiccate and die, or not form at all. I use a mixture of potting mix, coarse sand, coarse perlite, and pine bark fines/mini nuggets)
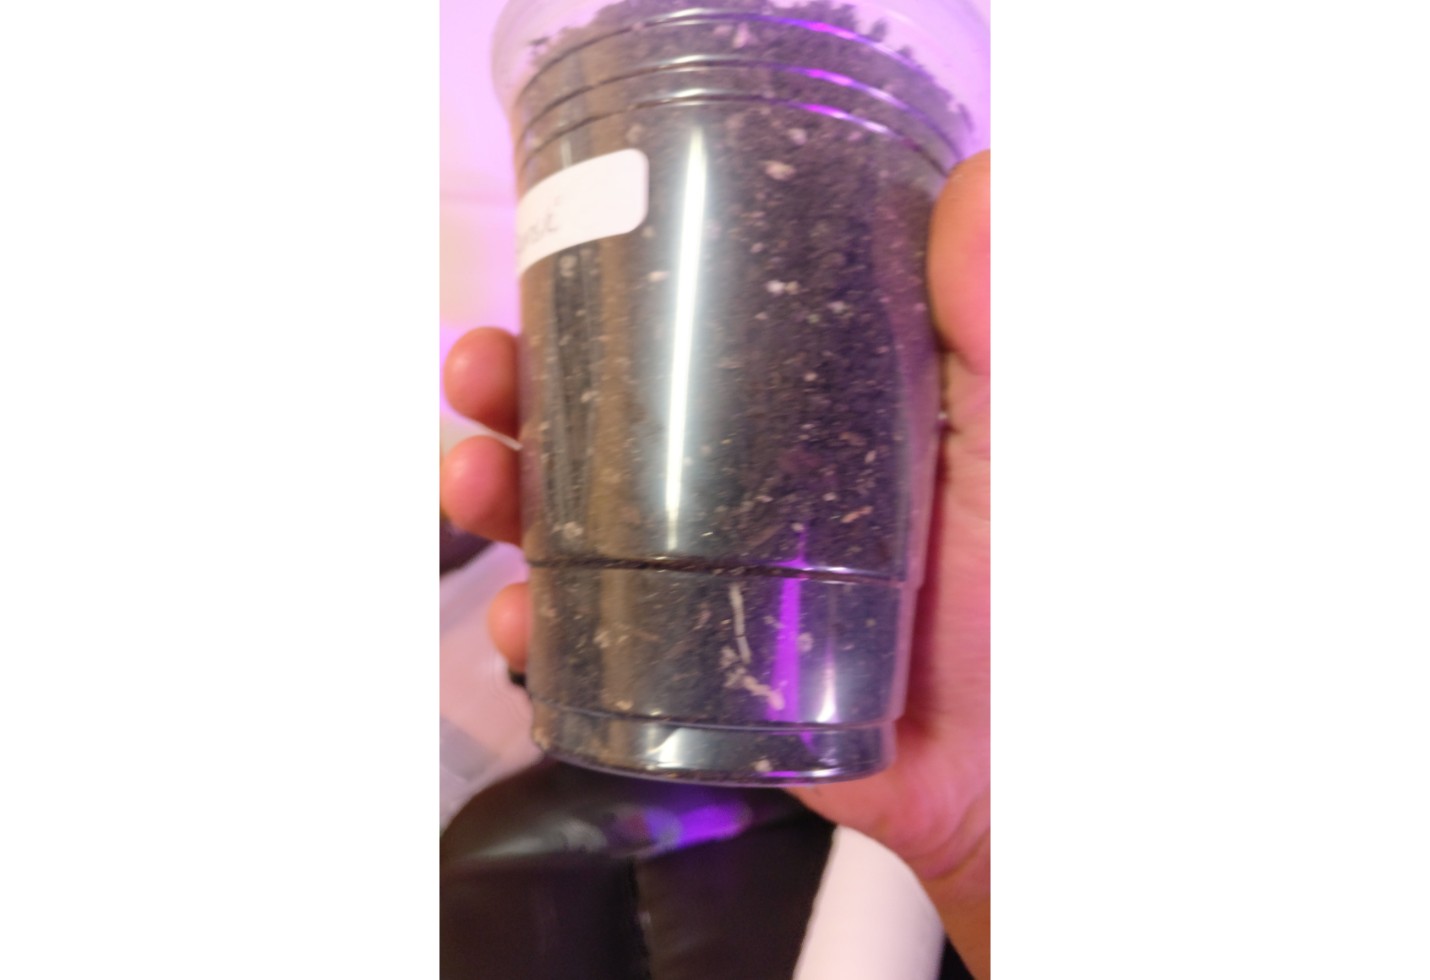
Go ahead, and take each of your primed and ready cuttings, poke a hole into the soil using your #2 pencil, a sharpie, a finger, etc., and insert the cutting into the hole you just made in the soil. Don't mash or compact the soil down, but lightly tap the side of the container to settle the soil in around the cutting firmly while allowing good soil aeration. The soil should be damp, but not wet or dry. You'll want to maintain this moisture level as priority # 1, next to providing humid air and warmth.
Note that if you are using clear cups, you will probably want to get some similarly sized opaque cups to go around the outside of the clear cups, so that light doesn't enter and interrupt the growth of the cutting's VERY sensitive roots. Just make sure whatever you use, that it has proper drainage holes.
At this point, you can add parafilm to the exposed 'above-ground' parts of your cuttings if you'd like, and your newly potted-up pomegranate cuttings can be placed in bright indirect sun or indirect 'sun' under grow lights.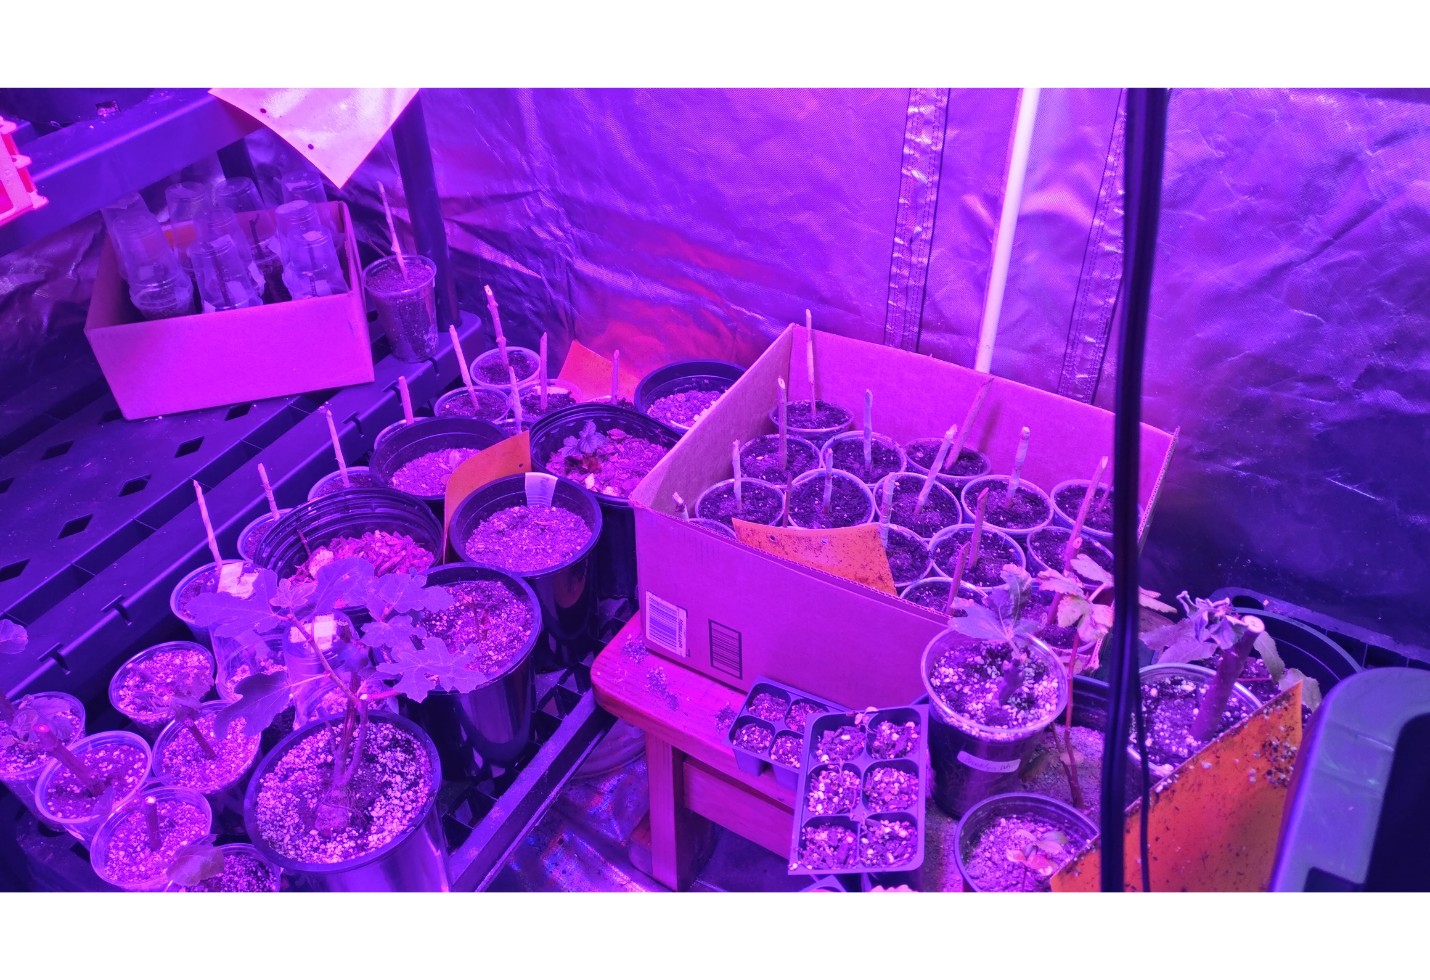
Do remember that, until the cuttings are established and the root system is clearly visible, the plants will not uptake much water, so less is absolutely more. Don't 'love' them to death by overwatering - and DO err on the side of caution while handling, as the newly formed cuttings' roots will be extremely fragile and brittle.
Also remember that until cuttings are established, death can result also from swiftly changing conditions like moisture, temperature, humidity, and light of the growing environment.
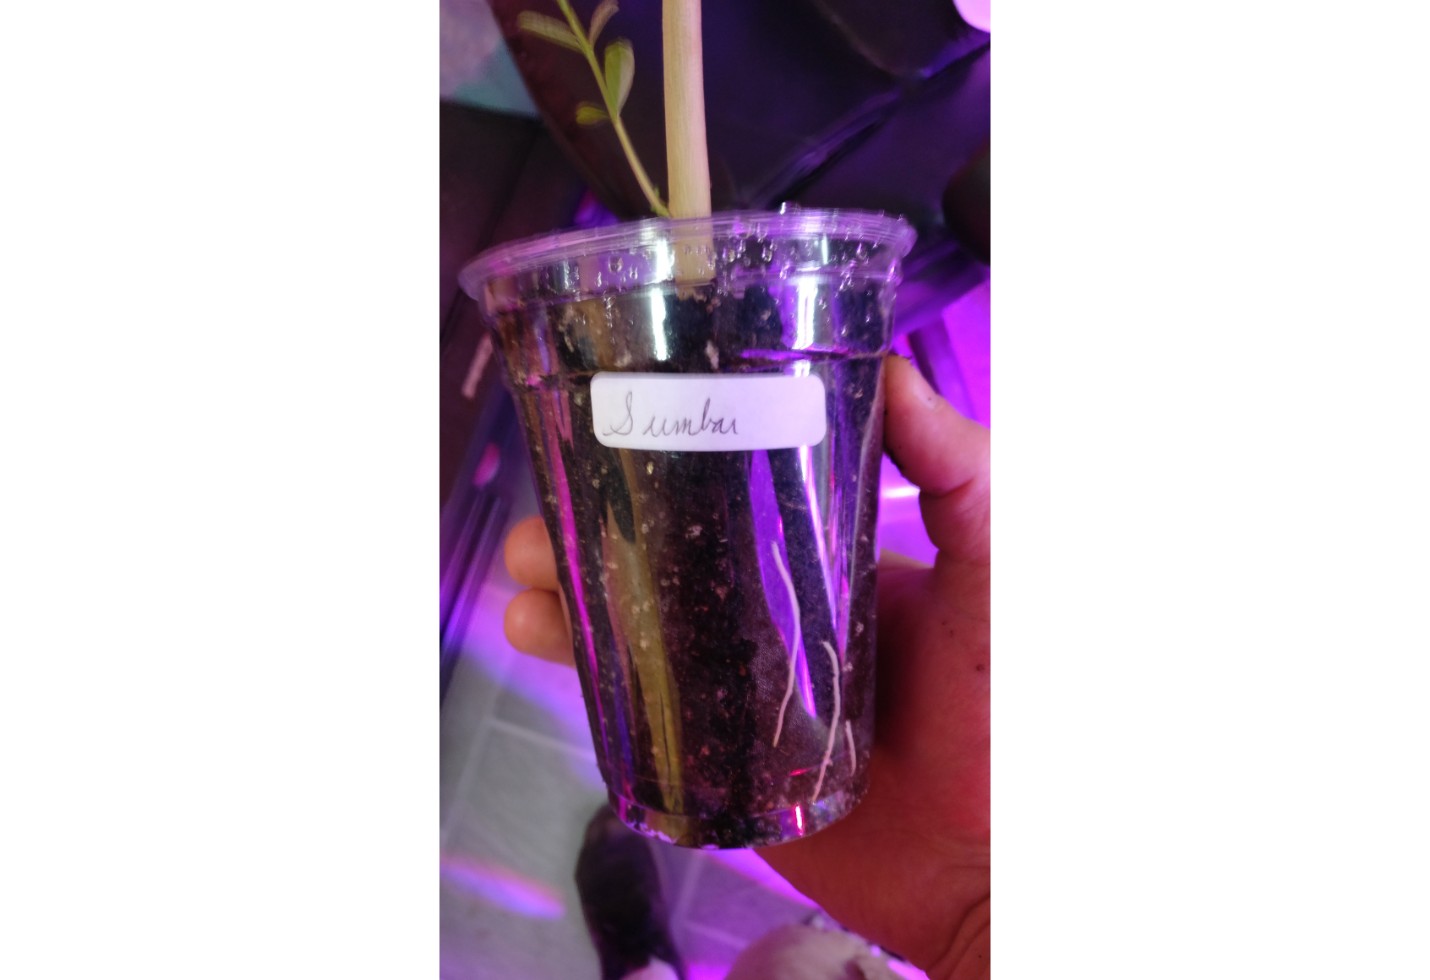
You'll want to transplant the cuttings out of the cups into bigger containers when you see that the roots are growing out of the drainage holes, or in the case of clear cups, if you can see a large healthy root system clearly visible. You'll want to make sure and wait for roots to be fully formed before transplanting while using this method, because you'll want the whole cutting (WITH INTACT ROOT SYSTEM!) to easily slide out of the container in a nice plug for repotting.
A common side effect of transplanting too soon, is breaking off the roots as it takes just the slightest twisting, tearing, or shearing motion and it's all over for the cutting. You can almost guarantee death of the cutting will result from damaging a new cuttings' roots, as the cutting only has a small, finite amount of energy to exhaust while trying to get established.
EXAMPLE/PATH 2 - PRE-ROOTING IN PROPAGATION MATERIAL
If you've followed the post but decided you'd rather figure out which cuttings are going to root first, and THEN plant them, this method is for you. I had slightly better success rates pre-rooting using this method, than with direct planting into containers/cups, but this process is a little bit more involved.
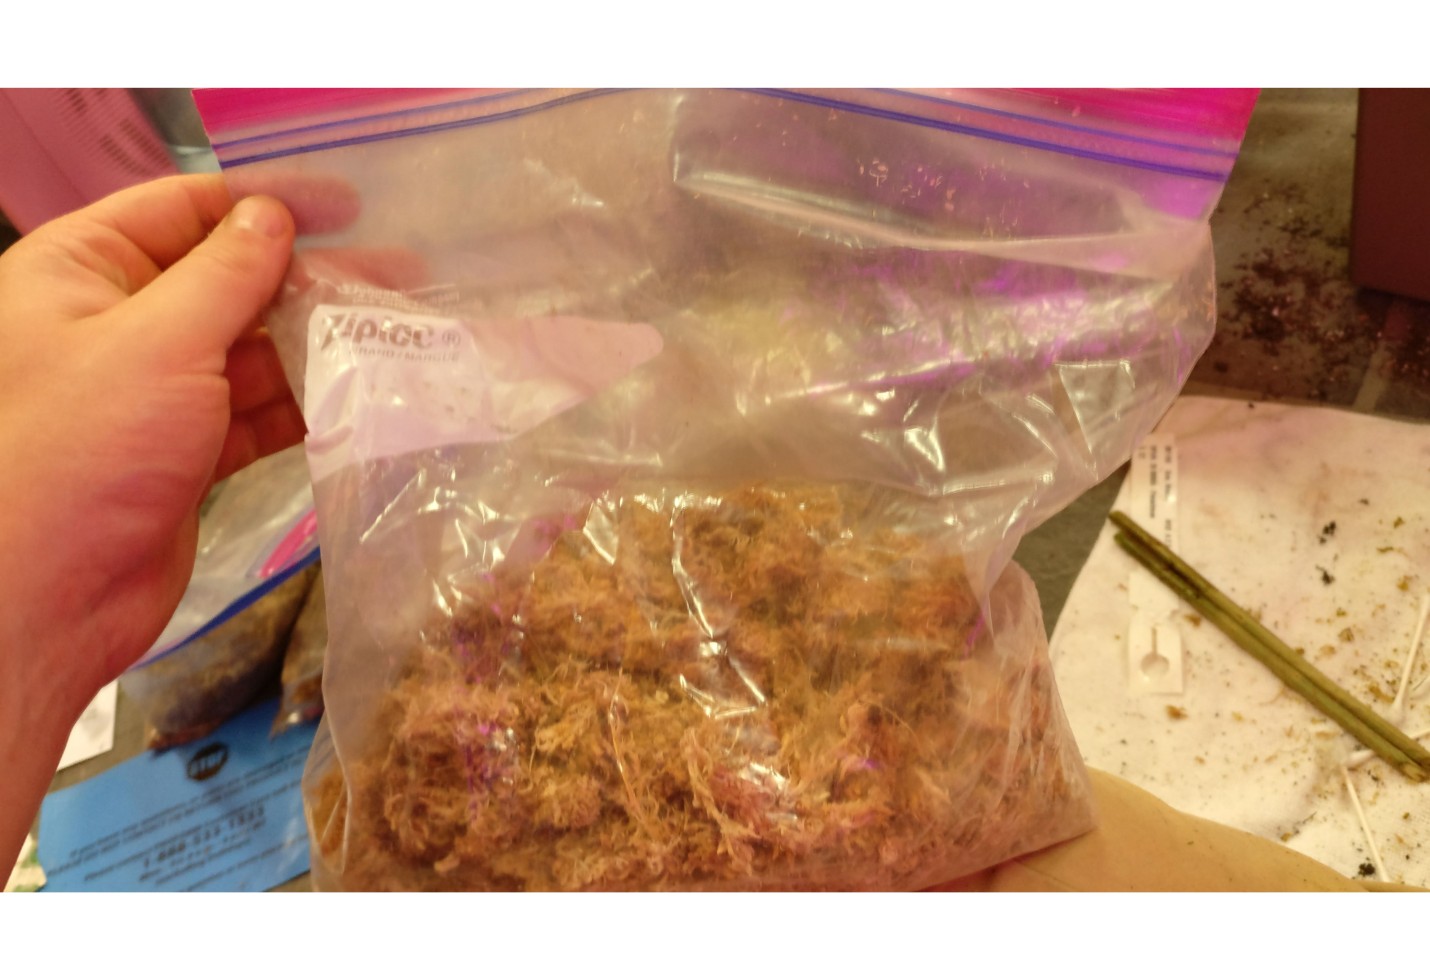
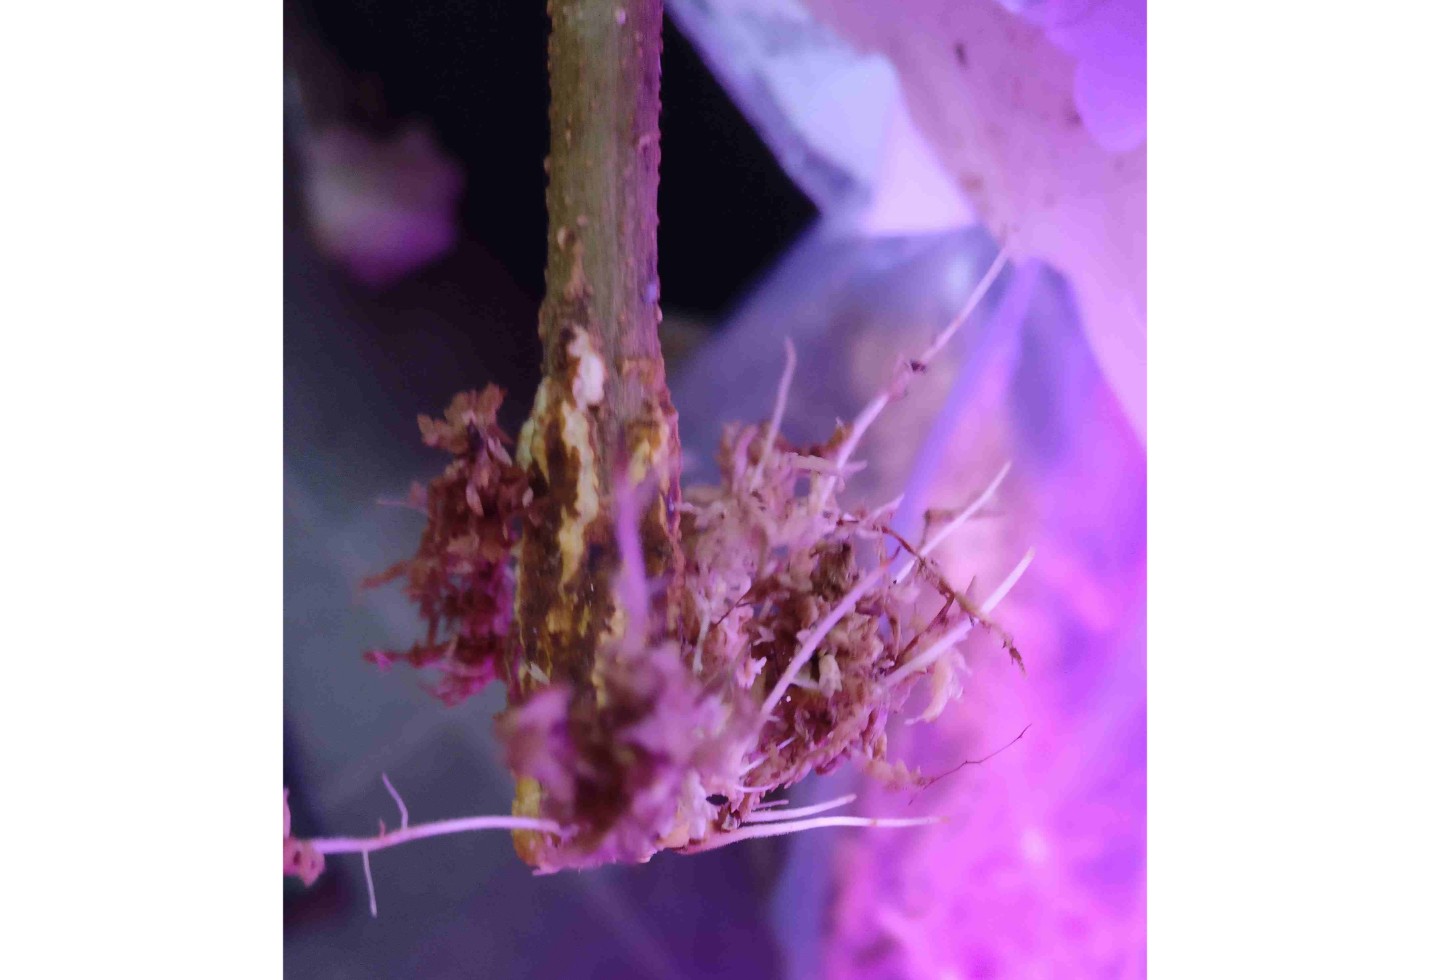
You'll need a large bag or clear plastic container, it will need to be able to hold moisture and gas inside. There are several propagation materials commonly used to pre-root cuttings, the one which I use is long-fibered sphagnum moss. Some people report good success using only perlite, or coir, or peat moss etc. - again, your mileage may vary so use the medium that works best for you.
I like to use sphagnum moss because it is very unique in its ability to hold a huge amount of air and water at the same time, while also having a very low PH which helps to prevent microbial growth. It's also kind of difficult to get the perfect amount of water into it, so keep that in mind - it's all about the moisture.
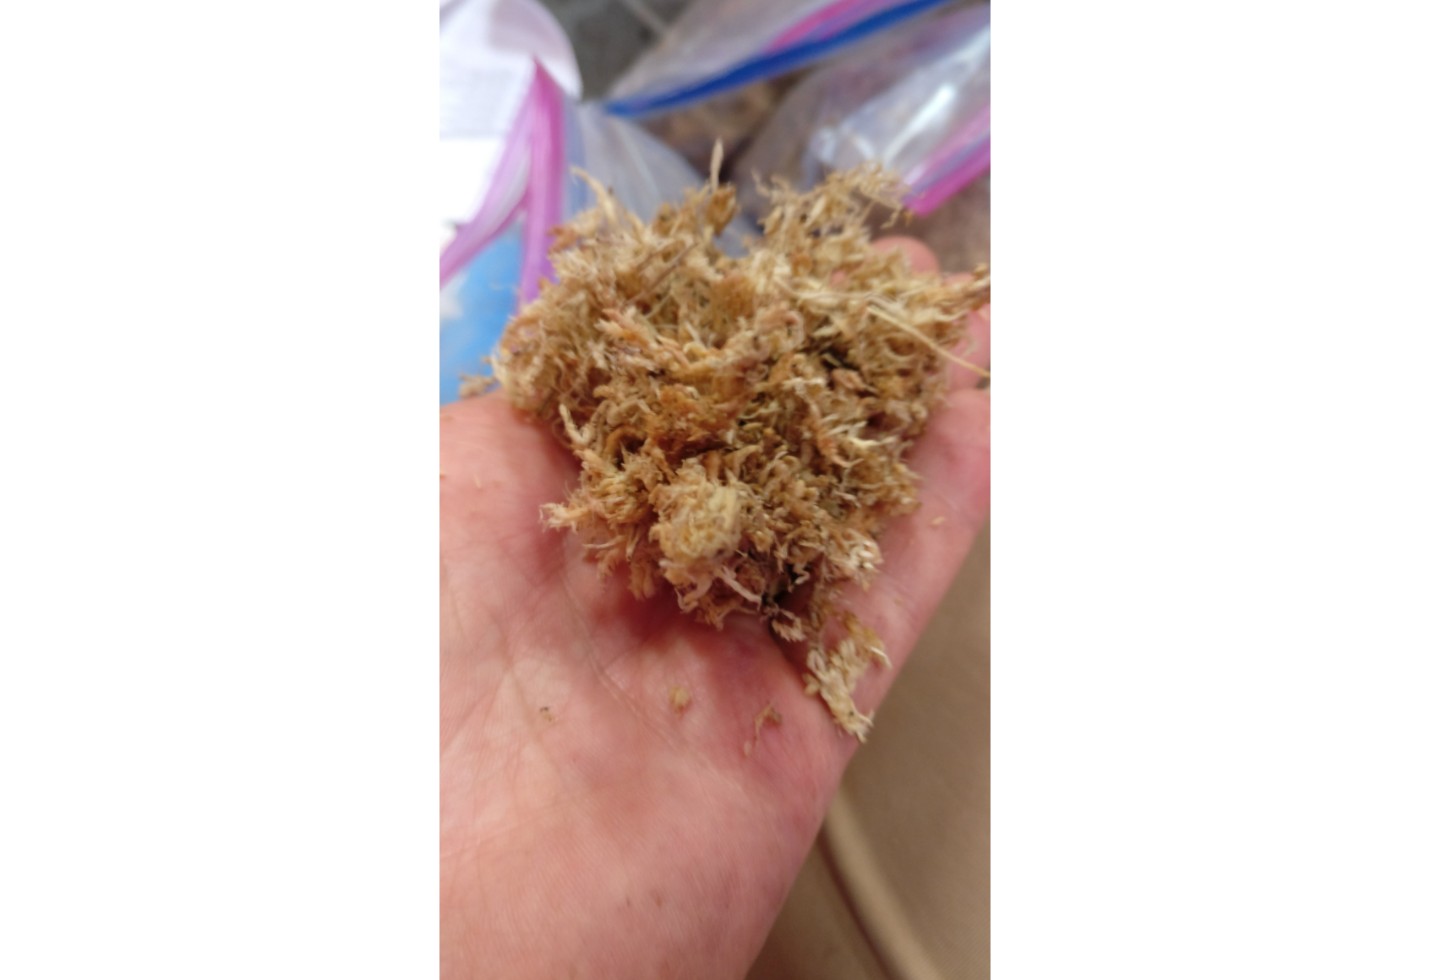
If you're using sphagnum moss, you'll want to make sure it is damp, but never wet enough to wring water drops out of it. This is about perfect for our pre-rooting needs. I use the 'orchid moss' type of long fibered sphagnum; get the best quality you can as the cheaper stuff has a LOT of debris and dirt in it.
Once you have your pre-rooting container/bag ready, and your cuttings ready (with the tips cut at an angle, rooting hormone applied, cambium exposed, etc.), you can place the cuttings in the bag or container, and sandwich them between moss at the bottom of the bag and at the top. You're wanting to make sure all areas of the cuttings are covered by the moss.
Once you have your cuttings in the bag or container with the propagation material, you can label the container with the cultivar info as well as the date and any other notable info, so it is easy to have this information when you need it.
Keep the bag or container in a nice, dark, warm environment between 70-80 degrees (f) and within a few weeks you should see roots forming, assuming the moisture is kept consistent. Don't check on them too often or you will inevitably disturb the growing conditions, or worse, the cutting's progress in rooting.
You may occasionally find that you need to spritz the moss or medium to maintain the perfect balance of moisture/humidity.
Be extremely careful with the new cuttings, as their new roots will be very fragile and prone to breakage. When pre-rooting, I usually transplant them when they have a few good roots, perhaps half an inch long. After confirming roots have formed a bit, I pot them up into a cup or 1 gallon planter with a really good and fast draining mix.
After transplanting, they can be treated like any other cutting - just be consistent in your moisture (in the growing medium, and the humidity) and lighting conditions.
CONCLUSION:
I've used both of these methods with lots of success. I had slightly more success while pre-rooting, but please take this with a grain of salt as my conditions may be very different from yours. You may also want to try these techniques for rooting other species, such as figs (Ficus carica).
I have seen others mention that they have also had success burying the cutting horizontally, with one side of the bud below 'ground' and one above - I have not tried this yet but might cover it in a future post. It's great to experiment and see what works.
I also want to note that there are many, many other methods of propagation, and each has a unique set of pros and cons, and a place where that specific technique really shines. There's really not a 'wrong' or 'right' way to do it, as long as the method consistently results in more plants! The methods I explored above are but a few of the many ways, and I'm sure my methods could be refined much further for better success rates with some more research and trail and error. I have killed a lot of plants to learn how not to grow and propagate them, there is really no substitute for experience in my opinion!
Either way you go - rooting pomegranate cuttings (or almost any other species, for that matter) relies on the "Goldilocks" combination of air and moisture in the rooting medium. Starting with good, disease-free cuttings from healthy trees is also critical for success.
Having said that, pomegranates in particular are an excellent beginning step into the - sometimes weird - and wonderful world of plant propagation, so give it a shot! Go Grow!
Hope you all have enjoyed my first horticultural post on the GoGrow blog, and have found it informative. Make sure to bookmark us and check back periodically for more articles like this!
(Article originally posted on GoGrow blog )